Friday, September 6, 2013

Something to Crow About!

Recently, I got to play art with two of my favorite art teacher friends Linda and Shawny.  We found fun crows at the dollar store and decided to alter them.  We all started with a steampunk theme, but each of them turned out completely different, but totally cute, of course! 
This is Linda's crow.  She attached swirls of rusted wire and copper toned gears with rusted nails.  The crow's body is made of styrofoam so it is easy to push into for attaching.  I love how the rust color looks with the black feathers of the crow! And that head piece is amazing!
This is my crow I made for my art group a while ago.  He wanted to get in on the photo shoot, even though he wasn't made at this art party!  I used black and white papers to embellish and attached him to a box which holds a secret nest inside! (shhh...)

This is Shawny's crow.  She added flowers, gears, rusted nails and wires.  I love how she wrapped the wire around the beak and feet.  She gave a feminine touch to her crow with the flowers and a feathery head piece. 
This is my crow created at the party.  I decided to use pink rickrack and feathers.  I used silver gears and black nails.  I also added a silver crown, a steampunk sash and black clock hands. He is definitely ready for an art party!

Psst!...Are you a crow lover like me?
You can see more crow art here and here!

Monday, September 2, 2013

Stitchies

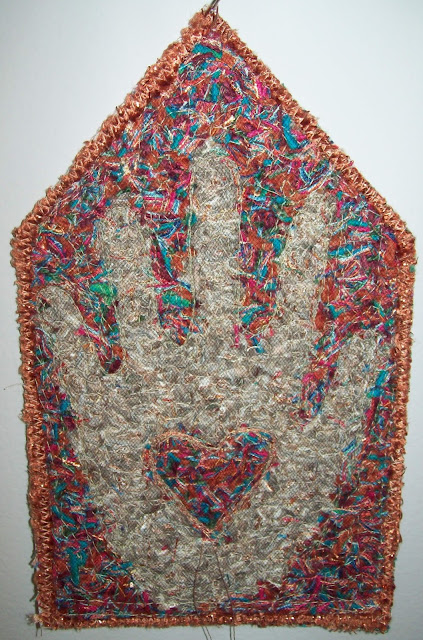
This summer I had the awesome opportunity to attend an art teacher camp sponsored by KAEA.  We were allowed to choose from a few options including oil pastels, sculpture, or fiber arts.  I chose fiber arts.  This workshop was taught by Marilyn from the Fiber Studio in Wichita, KS.  I learned a lot and was able to finish five pieces in two days!

We started out with a piece of heavy fusible interfacing that was about 6 by 9 inches.  We then began to cut up bits of various weights and textures of fibers to create a composition.
We then added a piece of black tulle over the top of the fiber pieces.  With a warm ironing, the pieces were loosely attached so that we could begin stitching through the layers using decorative threads.

The stitching was done on the sewing machine with a special embroidery foot and lowered or covered feed dogs.  After stitching through the layers, we could add more decorative fibers on top and/or a finished edging.
I had tons of fun coming up with a variety of different composition possibilities and playing with all of the fibers!  I am very glad I was able to learn a new skill and another artful use for my sewing machine!